Leave Your Message
Picking the right KNX Control Panel really makes a difference in how comfortably a building runs day-to-day. It’s not just about how fancy the screen looks—it directly impacts things like lighting moods, room temperature, shading, security alerts, and energy feedback. Sure, a sleek display might catch your eye, but it’s crucial that it communicates reliably with your Knx System and stays understandable years down the line.
Heinz Lux, who used to be the CEO of the KNX Association, once said, ‘KNX is the global standard for Home And Building Automation.’ And honestly, that stands out when you’re choosing a control panel. Compatibility should come first—better to have a panel that works flawlessly than one that just looks pretty. You might see a panel sparkling in a showroom, but it could lag behind or be unresponsive in your actual hallway. So, always check for its KNX certification, what communication methods it uses, firmware policies, and how well it integrates with HVAC, lighting, and access control. Also, ask if your installers can troubleshoot issues without having to swap out the entire unit.
Think about it—what you experience daily will tell you way more than what a glossy brochure promises. Test the display under bright sunlight, try pressing buttons with wet or even gloved hands, and see if your guests can figure out how to use it without a manual. A good Knx Smart Panel should give clear, immediate feedback, not keep you navigating endless menus. Keep scenes simple, maintain consistent labels, and steer clear of unnecessary animations.
Of course, no panel is perfect. Cost is another thing to think about. Cheaper options might mean needing extra gateways, custom programming, or more frequent service calls down the line. And even a high-end panel can fall flat if the overall project isn’t designed around a user-friendly interface. So, in this guide, I’ll run through ten practical things to keep in mind—screen size, usability, compatibility, cybersecurity, how easy it is to install and maintain, and whether you can count on long-term support. Ultimately, the right choice depends on the building, who's living or working there, and the installer’s experience—not just what’s trending or the latest gadget.
It’s all about finding that balance between tech and everyday practicality, making sure it feels natural and intuitive for everyone involved.
Choosing the right KNX control panel starts with defining the building’s real needs. Count rooms, lighting circuits, blinds, HVAC zones, sensors, and user profiles. Then describe daily scenes, such as “away,” “night,” or a dimmed evening setting. A Knx Lighting Control System should support these actions without forcing users through confusing menus.
Energy goals need measurable targets. The United Nations Environment Programme reported that buildings consumed about 34% of global energy in 2021. Its 2022 Global Status Report also linked buildings to 37% of global energy and process-related carbon emissions. These figures make monitoring, scheduling, and occupancy-based control practical priorities. Request live energy views, fault notifications, manual overrides, and clear consumption histories. Small screens can become frustrating.
Installation experience matters. Check panel visibility, mounting height, viewing angles, tactile feedback, and cleaning access. Confirm compatibility with the planned KNX topology, sensors, actuators, gateways, and future extensions. Specify user permissions and secure configuration procedures before procurement. The International Energy Agency’s Energy Efficiency 2023 report stresses the value of efficient building operation, not just efficient equipment. That distinction is often missed. I would also test the interface with a real resident, not only an engineer. Their hesitation may reveal an overlooked requirement. Leave spare capacity, document every group address, and budget for commissioning and staff training. A beautiful panel cannot repair unclear automation goals.
| No. | Requirement Area | Key Questions | Recommended Selection Criteria | Useful Technical Data | Validation Method |
|---|---|---|---|---|---|
| 1 | Define Automation Goals | What should the panel control, monitor, or automate? | Prioritize lighting, shading, HVAC, scenes, energy monitoring, and alarms before selecting hardware. | Create a written list of functions, user roles, rooms, and daily operating scenarios. | Approve a functional specification and map every required function to a KNX group address or interface. |
| 2 | Select the Appropriate Panel Type | Is a fixed wall panel, flush-mounted panel, or portable interface most suitable? | Choose a fixed panel for central room control and a portable interface when mobility is important. | Check mounting method, viewing angle, screen orientation, enclosure depth, and cable access. | Review architectural drawings and test the proposed installation position on site. |
| 3 | Confirm KNX Compatibility | Can the panel communicate with the planned KNX installation? | Verify support for the required KNX communication path, such as KNX TP, KNX IP, or an approved KNX interface. | A KNX IP connection normally uses Ethernet infrastructure; a KNX TP connection uses the dedicated twisted-pair bus. | Request a compatibility statement, integration guide, and a tested sample configuration. |
| 4 | Match Screen Size to User Tasks | Will users operate individual devices or supervise an entire building? | Use a compact display for room-level controls and a larger display when floor plans, dashboards, or multiple zones are required. | Evaluate usable screen area, resolution, icon clarity, text size, and the number of simultaneous controls. | Conduct a user test with typical viewing distances and representative control screens. |
| 5 | Plan the User Interface | Can users understand the controls without specialist training? | Use consistent room names, clear symbols, logical navigation, visible status feedback, and separate user permissions. | Include manual control, automatic mode, current status, fault indication, and a simple return-to-home path. | Ask representative users to complete common tasks without assistance and record errors or delays. |
| 6 | Check Power and Network Requirements | What power source and network connection are available at the installation point? | Confirm whether the panel requires mains power, low-voltage DC power, Power over Ethernet, Wi-Fi, or wired Ethernet. | Verify rated voltage, power consumption, connector type, network speed, IP addressing, and standby behavior. | Compare the technical data sheet with the electrical drawings and perform a network connectivity test. |
| 7 | Evaluate Automation Performance | How quickly and reliably should commands and status updates respond? | Choose a panel that provides responsive local control and dependable status feedback under normal network load. | Test command response, screen loading time, bus or IP communication stability, and recovery after a connection interruption. | Run repeated tests during normal and peak network activity and document failed or delayed commands. |
| 8 | Include Security and Access Control | Who may operate, configure, or remotely access the system? | Use role-based access, strong credentials, secure network segmentation, and encrypted communication where supported. | KNX Data Secure protects supported KNX telegrams, while KNX IP Secure protects supported KNX IP communication. | Review the security design, disable unused services, apply update procedures, and test access permissions. |
| 9 | Assess Reliability and Environment | Can the panel operate reliably in the intended location? | Match the panel to indoor or protected environments and confirm resistance to heat, humidity, dust, vibration, and cleaning agents. | Check operating temperature, relative humidity, ingress protection rating, surface material, and expected service life. | Compare environmental ratings with the site conditions and inspect the installation after commissioning. |
| 10 | Plan Future Expansion and Maintenance | Can the system be expanded or maintained without replacing the whole control strategy? | Select an open, documented solution with accessible project files, update support, backups, and scalable integration options. | Maintain ETS project documentation, group-address lists, device parameters, network settings, and commissioning records. | Require handover documentation, backup copies, maintenance procedures, and a defined replacement or upgrade process. |
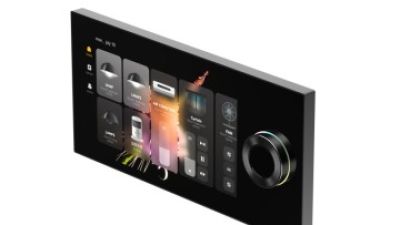
Smart Home Control is moving from scattered mobile applications toward centralized, intuitive interfaces. Statista Market Insights projects that global smart-home revenue will exceed US$150 billion in 2025, while industry research continues to identify interoperability and reliable connectivity as major priorities for users. The M20 Smart Knob Center Control Screen addresses these needs by allowing a single device or scene to be assigned to a knob or button, enabling direct control of lighting, climate, curtains, and other household functions without navigating multiple menus.
Designed for stable everyday performance, the system supports Wireless 5G, 2.4G, and 10/100M Ethernet connections. Its AI-assisted life album feature can also help families capture and preserve meaningful moments on the central display. Different configurations are available for varied installation requirements, including smart central control, background music, KNX, and PRO versions. With 4G memory, the PRO model offers broader compatibility with third-party ecosystems.
The M20 and M20 Pro provide RS485, two-way relay outputs, and zero-firewire L/N interfaces, while the M20-M adds AUX, SPK1, and SPK2 connections for integrated audio. For advanced automation projects, the M200-KNX includes KNX, AUX, relay, Type-C, SD card, and Ethernet interfaces. As a China-based supplier and factory, the manufacturer supports tailored smart-home solutions for residential and professional applications.
Count rooms, lighting circuits, blinds, heating zones, sensors, and user types. Describe daily scenes, such as night, away, and dimmed evening settings. Keep common actions simple. Include live energy data, fault alerts, manual overrides, and consumption history.
It should support monitoring, scheduling, and occupancy-based control. Set measurable targets instead of relying on general efficiency claims. For example, review heating schedules and room usage each week. Equipment efficiency alone is not enough.
Measure viewing distance, room size, daylight glare, and text readability. Small displays may suit bedside areas or narrow hallways. Larger screens often work better in kitchens and shared rooms. Bigger is not always better.
Place lighting, blinds, temperature, and scene controls within one or two taps. Use clear labels and readable icons. Physical buttons can help when users have wet hands or limited attention. Test one-handed operation in a real hallway.
Ask a guest to operate basic lighting and blind controls without training. Watch for hesitation, wrong taps, and confusing symbols. Test the panel with tired eyes, nighttime lighting, and bright windows. Engineers are not typical users.
Residents should rename rooms, adjust favorites, and change safe scene settings. Installers need deeper access for commissioning and fault diagnosis. Separate permissions for children, guests, residents, and technicians reduce accidental changes. More options can create confusion.
Check wall depth, cable bends, mounting height, viewing angles, and cleaning access. Flush mounting looks neat but may leave little service space. Surface mounting can work better during renovations. Confirm portrait or landscape orientation before drilling.
Test glare, nighttime brightness, power interruption recovery, and network loss. Confirm that screen status matches the physical device. An “open” blind icon is misleading when the blind is closed. Review updates, documentation, and future maintenance responsibilities.
Choosing the right KNX Control Panel starts with clearly defining your automation goals, such as managing lighting, climate, shading, security, and energy use. Before making a decision, confirm that the panel is compatible with your KNX installation and connected devices. Consider the screen size, display quality, interface design, and mounting style to ensure it fits both the space and the users’ needs. Easy navigation, flexible customization, and suitable user access controls can make daily operation more convenient and secure.
It is also important to review installation requirements, power options, and network connectivity before purchase. A reliable KNX Control Panel should offer durable construction, appropriate security features, dependable technical support, and a practical total ownership cost. By comparing these factors together rather than focusing only on appearance or price, you can select a control panel that delivers smooth operation, long-term reliability, and a better overall smart building experience.